bookmark_borderHow To Build A Solar Hot Water Heater

HOT WATER OPTIONS

Hot water for less

To get the most heat from the least amount of non-renewable energy, go for solar water heating. The next most efficient water heating option is probably a heat pump hot water system, followed by wetback water heaters and instant gas.

Saving hot water

There are several easy ways to cut down on your use of hot water without sacrificing your lifestyle:

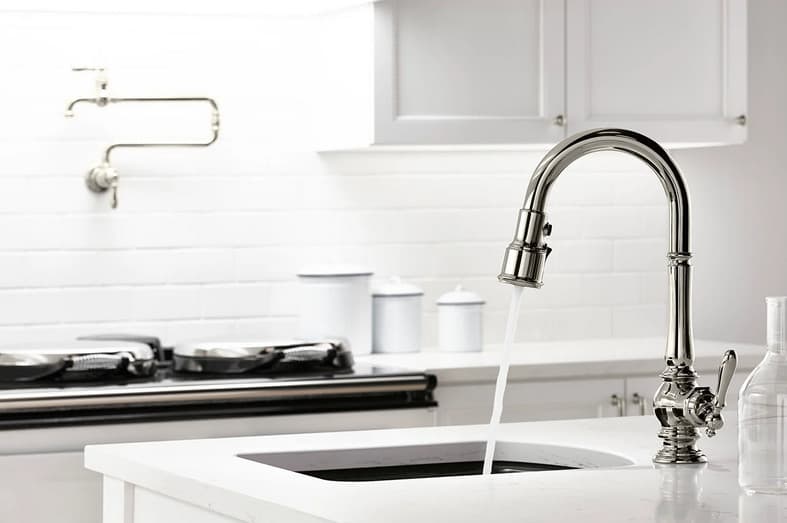
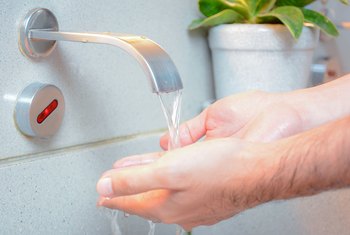
Fit water-efficient showerheads.

Fit water-efficient taps. Consider having your hot and cold taps separate. It’s more common to have a mixer these days – make sure the handle is left in the cold position so  it doesn’t draw hot water unless you need it.

Use cold water for washing clothes, rinsing, filling the jug etc.

Turn off the water heater when you go on holiday.

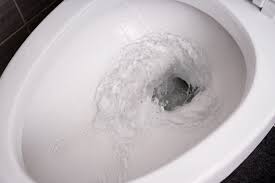
Have showers instead of baths and keep your showers relatively short.

Choose water-efficient household appliances.

Fix leaks and drips.

Don’t run the hot tap unless you need hot water

Water heating options

Solar water heating can provide a large contribution using free energy (the sun) and greatly reduce your reliance on reticulated energy sources. Depending on usage patterns and household size, the next most efficient water heating option is probably a heat pump hot water system.

Solar water heating

Solar hot water heaters use the sun’s free, unlimited energy. A well-installed system should be able to deliver up to 75 percent of hot water heating over the year, in most parts of the country

However, the concept of solar hot water heating has a few challenges:

the high initial cost compared with other water-heating options

difficulty in ensuring the system’s designed and installed correctly

difficulty in telling whether the system is working properly due to the non-user friendly interfaces

needs annual maintenance.

What to Do with an Old Water Heater

Have you recently changed or are about to change your water heater? Once your shiny new toy is giving you nice hot water, what do you do with the cast-off? Here are some ideas.

Firstly, whoever is fitting your new heater may be able to dispose of the old one for you. It could be that you want to dismantle it and scrap it yourself or take it for recycling. Alternatively, you might want to repurpose it so you can carry on using it for something else.

Cut the Power Supply

First things first! Disconnect the gas or electricity that has been powering your water heater.

Gas Water Heater

On a gas-powered water heater, there will be a shut off valve located on the supply pipe. Follow the supply pipe along its length until you find a lever. This will usually be level with the pipe when on; turn it through 90 degrees to shut off the supply.

Electric Water Heater

For an electric water heater, you’ll need to find your main electric service panel. This is generally located on a wall in your garage, basement, or the outside of your home. If you know which fuse or breaker switch supplies the power to your home then either remove that fuse or switch that breaker to off. If you are unsure or can’t find the right one then use the main lever which will be at the side or top of the box. This will cut the power to your whole house.
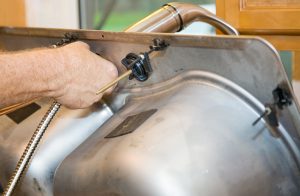
Drain the Tank

The next step is to turn off the water supply and drain the water from your heater. The water supply comes from a cold water inlet located near the top of the tank. Again, follow the pipe until you find the lever or knob to shut off the water.

Homebuyers feel duped by hot water tank rentals included in their new homes

She’s now living with a rental contract with Enercare that lasts for the “useful life” of the appliance (an average of 14 years), paying $56.43 per month for the water heater. She can get out of it if she buys the equipment outright at $3,600 — three times the cost of lower-efficiency models offered in some stores, but less than she’d pay for the same model she currently has in her home.

Buyer seeks documentation

But the law fails to address the issue at hand for buyers of new builds. She asked her builder for documentation about her contract, but she got a response saying that they didn’t have any. Her home purchase agreement does state that a buyer executes a lease/rental agreement for the hot water tank, but her lawyer argues it doesn’t confirm that she is taking it for up to 18 years.

says that in their agreements with home builders, “the home builder is required to provide all the necessary rental details to the purchaser and agrees to do so as part of their legal obligations under their agreement with Enercare

“A homeowner is not required to rent their equipment and can purchase it outright from the builder or otherwise negotiate with the builder.” On — who had rental contracts for his hot water tank, air handler and air conditioning unit — was quoted $5,000 for each unit if he were to buy them outright. “I did the math. It just wasn’t adding up,” he says.

Landlord chooses to rent the equipment

frustration with started in November when her tenants couldn’t get hot water due to a broken part of the hot water tank. “I was so angry,”

Water Heater Repair Services

Hot water is essential to your home or business. It’s something we take for granted until we don’t have it. There are a few reasons that can cause you to have no hot water and they all involve your water heater.

TYPES OF WATER HEATERS WE REPAIR:

Standard Tank Water Heaters

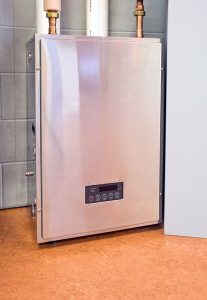
Tankless Water Heaters

Commercial Water Heaters

Unfortunately, because many water heaters are gas or electric you usually need to call an experienced plumber to help find and repair your water heater problem. When you have a problem with your water heater you need help fast.

has many experienced technicians available to repair all types of water heaters. Whatever your water heater problem, you can turn to for fast reliable service to your water heater problem anytime, day or night. Because know that hot water problems happen when you least expect them plumbers are available

Standard Water Heaters

can replace all types of tank water heaters. Many times water heaters fail when you’re least prepared. experienced plumbers can replace water heaters same day for emergency situations.

Will a Tankless Water Heater Really Never Run out of Hot Water?

are big proponents of new technology. The newest advances for storage tank water heaters have made them more energy-efficient than ever before. But often recommend homeowners try a different type of water heater technology to take advantage of new methods for heating up water, such as a heat pump water heater, which uses heat from the air to warm up the water.

especially excited about the tankless water heater. Although the tankless water heater isn’t exactly “new” (the first versions were invented in the late 1900s), the technology that has made them useful and affordable options for households is a recent development. When people hear about the benefits of these water heaters, they’re often excited about their possibilities.

Is This Really True? Will I Never Run out of Hot Water?

Answering this requires some explanation about how a tankless system works compared to a storage tank system. A storage tank system does exactly what it says: it stores water kept at a high temperature so it’s ready for use. But this means the supply in the tank can be depleted, and it can take a while for the natural gas burners or electric heating elements to replenish the heated water supply. People can end up with cold showers until that happens.

With a tankless system, there isn’t a supply of hot water that can be depleted. Instead, the water heater heats up water as there is a demand for it. If you turn on the shower for hot water, the tankless system will detect the movement of water in the hot water lines and start to apply heat through a heat exchanger to the water. It will keep doing this as long as there is demand—and that means you won’t run out of hot water!

But … yes, there’s a downside to this. Although a tankless system can’t run out of hot water, it can be overwhelmed with demand. A single tap won’t do this: run that single shower all you want, you’ll keep getting hot water. (But please don’t do this! Save water, save energy!) If more than one tap is on-demand hot water at the same time, however, such as other showers or a running washing machine, the water heater will struggle to keep up and drain extra power.

bookmark_borderFactors To Consider Before Purchasing Kitchen Faucet

How to Reset a Faucet

Automatic faucets have made their way into the home. You can add a touch sensor or motion-activated faucet anywhere a regular faucet is used. These faucets are handy because they don’t require turning a handle to get access to water. For any number of reasons, the faucet may quit working. When the touch-sensor or motion-activated faucet quits working, the first place to check is the battery compartment. Replace batteries as needed. After replacing the batteries, the faucet make require a reset to work.

Locate the battery compartment under the sink and remove the dead batteries. Some automatic faucets have a red light-emitting diode that flashes when batteries are getting low. The light is found near or on the battery compartment.

Open the battery case and realign the batteries with the positive and negative poles in the right positions according to the layout in the battery compartment. Close the battery compartment. Make sure it locks completely before continuing.

Locate the reset button, if any, on or near the battery compartment, after changing out batteries.

Push the red reset button to reset the faucet.

Test the faucet to ensure the reset corrected the problem.

Tip

Not all automatic faucets have red reset buttons. Some faucets just require inserting new batteries or realigning the batteries in the compartment to complete a reset. on the faucet. Check the instructions that came with your automatic faucet or locate the user’s guide online at the manufacturer’s website.

Kitchen area Faucet Mend – No Much more ‘Sob’ Operas

Exhausted from all that cooking, its time for you to hit the sack. But you will find some thing in your kitchen area that’s certain to place your splendor snooze in mortal jeopardy. Is it that creaky kitchen area cabinet that you choose to vowed to established proper when undertaking the next transforming task? No, truly it’s a thing more innocuous. It can be the kitchen’s leaky faucet that appears to have launched into a singular mission of decimating all your comfort. Take it easy, you will find a perfectly pragmatic option in sight for this ubiquitous difficulty. Kitchen area faucet restore, the same as kitchen faucet set up, could seem incredibly difficult, even so the point on the make a difference is it truly is kid’s perform. Be it a bronze kitchen area faucet as well as a brass kitchen area faucet, you’re never ever far away through the remedy of the best way to restore a dripping kitchen faucet superior ball screw repair.

Know the system inside of out

Right before you can get to find out the intricacies of kitchen area faucet restore, it can be essential to familiarize on your own together with the doing work of a kitchen faucet. Kitchen taps are classified in to four various types- the cartridge kind, compression, ball and disc form. While the cartridge, ball and disc style of faucets have single handle control, the compression style of faucet is characterised by dual handles for both equally scorching and cold water. The truth is this sort of faucet is armed with washers and seals, some thing one other 3 absence. The existence of O-rings and neoprene seals ensure that you can find no leaks.

The reasons for those annoying leaks

Before undertaking any repair work, it’s important to diagnose the root cause of this galling problem. A faucet leak in the kitchen may be caused by worn out washers, seals or O rings. Even the presence of antiquated inlet and outlet seals may be the reason for the kitchen faucets not being up to snuff. Sediments in the inlet valve may lead to a leaky faucet.

Steps to fix that leaky faucet

Here are a few steps that are sure to put an end to this obnoxious problem:

* Firstly, turn off the hot and cold water valves. Loosen the screw at the base of the handle and remove the faucet.

* Make sure you line all the parts of the faucet in the order in which you remove them, so that putting them back does not seem to be like a jigsaw puzzle.

* Put a piece of tape around the plier to prevent any tell-tale signs of repair on the faucet.

* Remove all the inner parts by loosening the retaining nut.

* In case you find that the ball valve is damaged, replace it immediately.

* Replace all the springs and seals that are worn out.

* Remove all traces of sediments on the inner parts. Check for cracks on the O rings and gaskets.

How to fix a Ceramic disc faucets

Ceramic disc valves are simply another type of cartridge. Discs inside the cartridge control the water flow. This type of valve is sturdy and reliable and rarely needs fixing. In fact, many manufacturers offer a lifetime guarantee on the cartridge. If yours is damaged, check with the manufacturer to see if it’s covered by a warranty.

Leaks can result from faulty rubber seals or a cracked disc inside the cartridge. Since it’s difficult to spot a cracked disc, and disc cartridge replacements are very expensive, it’s best to start by replacing the seals and reassembling the faucet. Then if the faucet still leaks, remove the disc cartridge and take it to the store to order a replacement.

Early versions of ceramic disc faucets may be more fragile and can crack if subjected to a blast of pressurized air. That’s why it’s important to leave the faucet open as you turn the water back on. This allows air trapped in the lines to escape. When the water runs smoothly, it’s safe to turn the faucet off. Manufacturers have improved the strength of ceramic discs on newer faucets to withstand air blasts, as well as abrasive debris that may get dislodged from the inside of pipes.

Replacing the Faucet Valve Seat

In case the compression type of faucet is still leaking from its spout despite servicing the valve, then it’s possible that the faucet valve seat is nicked or cracked.

The faucet valve seat consists of a metallic component which is threaded and screwed into the valve base. You should use the seat type wrench to remove the faucet valve seat. This wrench resembles the taper hex type of wrench.

You’ll need to detach the valve once again. Then insert the wrench deep within the housing of the valve until it fills the hexagonally shaped hole.

Next, rotate the wrench in a counterclockwise direction to remove the valve seat. You’ll easily find replacements in your local hardware stores.

You can carry the old faucet valve seat with you when buying a replacement to ensure you purchase a matching replacement.

bookmark_borderThe Do It Yourself Fixing Of A Clogged Toilet

5 Ingenious Ways to Unclog a Toilet

The only consolation in this dreaded scenario is that it happens to all of us. And, in the end, it might make for a good story for your closest friends to enjoy. But take heart, there are some simple solutions for this always-untimely event. The following are 5 time-tested tricks that have worked wonders for many a poor soul, listed here from the easiest to the hardest.

1. Do nothing but wait, then flush.

Toilets, like all plumbing drains, work by the force of gravity. A full bowl of water exerts its own pressure on the clog and, over time, often will clear the clog for you. So if you have more than one bathroom in the house, just wait it out overnight, or as long as you can. Then, try to flush again. If it’s a standard clog (too much paper, in most cases), this passive solution is surprisingly effective.

Warning: When you do the test flush after the waiting period, be ready to stop the water flow to the bowl (see Top Toilet Tip, below), just in case this method didn’t work.

2. Pour in some hot water. Wait. Flush.

If you don’t have the time to wait out the clog, or if you’d like to increase your chance of success by giving gravity a helping hand, you can pour a few cups of hot water into the bowl. Proponents of this technique believe that the hot water helps to break down the waste, thereby loosening the clog. Can’t hurt to try. However, this doesn’t mean you should be pouring pots full of boiling water into a cold, brittle, china toilet bowl, which could crack it. 

3. Add soap. Wait as long as possible. Flush.

This is clearly the preferred method when you’re not at home and would do anything to avoid having to break the news to your hosts. A few good squirts of liquid dish detergent is perhaps the most popular method, but again, if you’re a guest and not alone in the house, it can be hard to explain why you have a sudden need for Palmolive in the bathroom before you’re ready to join the party again. Other lucky souls have reported that liquid hand soap or shampoo have done the trick nicely, too. The theory here is that the soap breaks down the waste faster than water alone. When it’s time to flush, be ready to stop the water to prevent spillover. 

4. Plunge like a pro.

First of all, standard cup-type plungers don’t work well on toilets because they can’t provide a good seal over the drain hole. Instead, use a flange plunger, which has a rubber sleeve that extends down below the domed cup, or boot, section. Flange plungers with accordion-like boots work well, too. Make sure the flange is extended (it can fold up into the boot), then lower the plunger into the toilet at an angle so the boot fills with water and isn’t trapping air. Insert the flange into the drain hole and press down so the boot seals tightly around the hole.

5. Use a closet auger.

A closet auger, or toilet auger, works just like a standard drain snake but is specially designed to accommodate the sharp turns of a toilet trap without damaging the bowl (which standard snakes can do). Work the business end of the auger into the drain hole, with the bend in the handle pole pointed toward the drain route. Crank the tool’s handle clockwise and work it in and out a little to break up the clog. If a solid object, such as a sponge or rag, is creating the clog, crank the auger clockwise to snag the obstruction, then pull it out of the toilet.

A Few Additional Tips On How To Maintain Your Plumbing

  • Watch what you put down your kitchen sink. Dumping grease, chicken scraps, and tough fruit peels down your kitchen drain is a sure fire way to clog your sink, no matter how good your disposal is.
  • Use a hair trap. A metal or plastic hair trap that fits over the shower drain is a cheap, effective way to prevent annoying clogs and having to pull nasty hairballs out of the drain.
  • Don’t flush wipes and hygiene products down the toilet. Hygiene products are not plumbing safe, and even the wipes that are supposedly flush-friendly are not. Toss them in the trash.
  • Watch out for leaks. Not only do leaks waste water, they can also cause mold and dry rot. Check your pipes occasionally for any sign of water leaks, and call a plumber ASAP if you see one.
  • Reduce your water pressure. For about 8 to 10 dollars, you can buy a water pressure test gauge that twists onto your garden hose. If your water pressure is over roughly 80 PSI, then your plumbing is being strained, and there’s a high risk of leaking and failure. If the pressure is too high, hire a plumber to install a pressure reducer (this is not the same thing as the water flow reducers often used in sinks and showers).

Use a Closet Auger

  1. Put on rubber gloves and position a bucket near the toilet.
  2. Extend the auger handle.
  3. Insert the end of the auger into the toilet trap. The sheath around the end of the auger fits the contour of your toilet’s bowl and trap and protects the toilet against scratching.
  4. Push the auger handle in until you feel resistance. The resistance is the auger cable pressing against the material causing the clog.
  5. Crank the handle to rotate the cable. Push the handle in as you crank to break up the clog or hook it with the end of the cable.
  6. Extend the handle again to remove the cable and any clogged material the cable tip may have hooked. Remove the excess material to the bucket.
  7. Watch for the water to drain out of the toilet. This means the clog has broken up and the material has flushed. Pour the material from the bucket back into the toilet to flush in small amounts when the clog has cleared.
  8. Repeat the auger process if the first attempt is unsuccessful. Contact a plumber if you’re unable to remove the clog after numerous attempts.

Two Unlikely Home Remedies for Clogged Drains!

There are many methods to unclog your drains, but these two home remedies may take you by surprise. Although they might not seem like the most conventional methods, they can help you unclog the smallest to the most stubborn drains in your home:

Coca-Cola: Not Only Hard On Enamel

Surprise! Coke or Pepsi are great for vanquishing a clog! Everyone’s heard about how a nail will dissolve in a glass of coke over time, and although most of us know this is a stretch, coke is arguably better than many commercial chemical clog removers because of its strong dissolving agents!

To get started, purchase a two liter bottle of Coke and allow it to acclimate to room temperature. After pouring it down the drain, let it fizz and work its corrosive power for an hour or two before running hot water. Coke and Pepsi are loaded with phosphoric acid, which breaks down buildup that can clog your drains! Phosphoric acid can even remove lime scale and other tough buildup that regular cleaners struggle with. This is a effective and refreshing home remedy if we ever saw one!

Using A Plunger in Your Sink or Bathtub

If your sink or bathtub is clogged beyond what a little Coca-Cola can clear, it might be time to pull out the big guns: the plunger! This may come as a surprise to those of us who only call on this device when we’ve got a clogged toilet, but yes, you CAN use it for other clogs. If it’s your sink that’s giving you issues, fill it about halfway, and if it’s your bathtub, stick to about four or five inches. This method, although effective, can be messy, so be prepared! Another tip to remember when using the plunger is making sure that it has water in it. Using a plunger is transferring energy through the pipe to dislodge the clog. If your plunger is full of air, it’s less effective because of the energy lost. If your plunger is full of water, all that energy is going to be submerged in the water, which will put more force on the clog.

How To Unclog Your Toilet With Baking Soda And Vinegar

If the toilet remains clogged after a few attempts at resolving the problem, remove at least half of the water from the bowl. Then try pouring 1 cup of baking soda and 2 cups of vinegar into the toilet. The mixture will bubble excessively, which is why it’s important to first remove the excess water. Let the bubbles sit for at least 20 minutes before you try to flush.

bookmark_borderThe Best Kitchen Faucet For All Designs And Needs

How to Choose the Perfect Kitchen Faucet for Your Kitchen?

Buying Considerations

Going head first into buying a kitchen faucet can be a costly venture for the unprepared. Beyond the pitfalls that could lead to you calling in a plumber, is getting it installed only to see it’s not really what you want. The kitchen faucet decision should be treated with care since you’re dropping so much on one item. Every kitchen has its own little theme so tailoring your wants and needs to a specific type is vital in the search, as what your neighbor has may be completely different than what you need. Below are some of the main considerations when looking for a kitchen faucet that you can use efficiently. After reading the 5 sections you should have a better overall idea of what it is that would work best in your kitchen, and you may even get some ideas for some of your friends. Don’t be afraid to spread the word or even do some Christmas shopping! There is always someone that could use a

How to Install Faucet?

Take a good look at the area that you will be installing your new kitchen faucet into. Is there a faucet already there that needs to be replaced? Is this a completely new build that doesn’t have the hoses in place? And do you have a specific theme?

What Type of Sink Do You Have?

This may come as a surprise to some people, but there is a variety of kitchen sink types other than stainless steel. Stainless steel makes up the bulk of the industry and is clearly the leader. It is installed in more homes than all the other sink types combined, a statistic that won’t be changing anytime soon.

What Design Does Your Kitchen Sink Suit?

The design of a kitchen faucet will come into play when deciding if you are comfortable with the two lever or single lever system. As a reference, the two lever system is considered to be dying out, as the advantages of having it have been trimmed down to simply being able to use if one of the handles go out.

What Styles Should Prefer?

This is one of a more pleasing parts of choosing a kitchen faucet when it becomes all about matching it with your décor. Starting with modern, this is the style that has been most associated with the kitchen faucets that use motion detection. In a kitchen that ha all of the bells and whistles, why skip the kitchen faucet? The transitional style has a blend of both modern and traditional aesthetics, making up for the lack of technology with some of the most standout finishes available. Transitional styles usually have the most prominent finishes. Traditional isn’t as bland as it sounds and gets its inspirations from a lot of European kitchens in style.

How to Choose the Ideal Kitchen Faucet

When buying a house, one of the biggest factors in the decision process is the appeal and functionality of the kitchen. For them, and for most of us, the kitchen makes the house. We tend to be very busy in the kitchen, more so than in other rooms. Our cooking space is often a showpiece, which needs the “right” accessory. An ideal kitchen faucet suits the needs of the owner, and enhances the look, feel, and functionality of the kitchen. Thus choosing the right kitchen sink faucet is one of the important decisions to consider during a kitchen renovation. Here are the 7 steps of selecting your ideal kitchen faucet.

Choose Your Location – Decide whether you want a sink-mount, deck-mount or a wall-mount kitchen faucet. Wall-mounted installations are best suited for single basin sinks, while deck-mounted installations are best for farmhouse and undermount sinks. If you are replacing a sink mounted faucet, you should be aware of the number of holes available.

Know Your Sink – You should ensure that you know the number of holes in your sink or counter before you go kitchen faucet shopping. Faucets with one hole provide a simple and clean look, whereas a second hole gives you more options, such as a lotion dispenser or a side spray

Get Your Arc Right – You know the pain of trying to maneuver large pots and pans under a low spout, and on the other hand, wanting to avoid a high spout obscuring a window view. So get the arc of your kitchen faucet right. If you want more workspace over your sink, the high arc faucets will give a clear 8-10 inches above your sink plane. Otherwise, a low or mid arc spout will serve the purpose.

The Right Sprayer – Know your need when it comes to choosing the spray functions. People opting for extended reach prefer pulldown kitchen faucets, whereas pullout faucets, with their streamlined arcs, are easy to hold and use. You also have the option of a side spray kitchen faucet.

The Ultimate Guide to Choosing a Kitchen Faucet

Choosing a kitchen faucet can be overwhelming thanks to the vast array of kitchen faucet options, features, and accessories that are available. As kitchen showroom consultants, we aim to simplify this process and compile all the information for you so that you can make the best choice. For many families, most of the time at home is spent in the kitchen, which makes choosing a kitchen faucet all the more important–not just in terms of functionality and usability, but also in terms of how the faucet will enhance the look of our kitchens and homes. Avoid the inconvenience and the mediocrity of having the wrong kitchen sink and faucet, by evaluating all of the options beforehand.

Evaluate the existing kitchen

What kind of features and fixtures already exist in your kitchen? Will you be keeping the current design or getting all new fixtures? Get started by selecting a complementary faucet for your kitchen sink. What sink and faucet style and installation options will best meet your needs? Is your sink made of enameled cast iron, glass, stainless steel or composite material? What faucet finish will match the other elements in your kitchen?

Choose your faucet functions

Once you have decided the overall look and type of faucet that will fit well with your kitchen area, decide exactly what you need from a kitchen faucet. What is your faucet style? Do you offer use large cookware that might be best accommodated with a high-arch spout? Do you prefer to operate the faucet with a single handle, two handles, or touchless technology? With response touchless technology, simply wave your hand, utensil, pot or pan through the sensor window to turn your sink on or off.

Choose your faucet finish

Once you have selected a kitchen faucet, choose a finish that complements the other colors and metals in the room. Or choose a finish that makes its own bold style statement. Whatever you prefer, Kohler has one of the largest selections of faucet finishes, from a deep Vibrant® Polished Titanium, an antiqued Vintage Nickel, or the warm Vibrant Moderne Brushed Gold that is sure to make a statement in any room.

Choose the finishing touches

Consider the functional accessories that streamline kitchen tasks and keep sink bowls tidy. Most are easy to install and are a great way to enhance your kitchen faucet. For example, keep your countertop clear by storing liquid soap, dishwashing liquid, or hand lotion in an under-the-sink container. Soap dispensers are available in a range of designs and finishes to match your kitchen sink and faucet.

How to Pick a New Kitchen Faucet

The kitchen faucet’s basic function is to dispense hot and cold water for washing dishes, food and hands. But beyond that it’s a major player in defining the style of your kitchen design.

With all the new — and old — designs, finishes and mounting styles out there, it’s easy to get overwhelmed when choosing a faucet. Having the basic information on hand will make things easier. Here’s what to consider.

Sink-mounted faucets. There are many different kitchen faucet and sink designs, but they are not always compatible. If you are working with an existing sink, check how many mounting holes it has. New faucets come in one-, two-, three- or four-hole varieties.

Deck-mounted faucets. With these the faucet mounts directly to the countertop and not the sink. If you are installing an undermount sink, you have the option of mounting the faucet directly on the countertop. When installing a deck-mounted faucet, make sure to allow more than a finger’s width behind the faucet for cleaning.

Wall-mounted faucets. Take care when placing a wall-mounted faucet to make sure it will work together with your sink. The distance the water spout projects will determine whether the two will be compatible. This can be more of an issue with a double sink.

How to Choose Your Kitchen Sink Faucet

As one of the most used features in your home, choosing the right kitchen faucet is not a decision to take lightly. This comprehensive guide gives you all the information you need to make a good choice. Find comprehensive tips on faucet mount, number of holes needed for installation, picking the right faucet style, finish, and features and how to measure for kitchen faucet size and reach. This guide also includes a comparison of pros and cons for kitchen faucet finishes.

Measuring For Kitchen Faucet Size and Reach

It’s important to check every aspect of the size of your faucet before you order. First, you need to address size as it relates to functionality. Second, to look balanced, your faucet should be in proportion to the sink. A large faucet would visually overpower a small prep sink, while a small faucet might look odd in a large sink and countertop area.

Height

You may find height expressed as deck to top of faucet and/or deck to aerator. Make certain you are choosing a faucet with adequate height to accommodate the items you’ll be washing or filling. The higher the spout, the easier it is to fit tall pots under it for filling or cleaning. If you have a shelf above your sink or a wide window ledge, a tall faucet may not fit

Reach

This important (and often overlooked!) measurement refers to the horizontal distance from the faucet spout to its point of connection with the sink or countertop. In other words, how far the faucet extends into the sink. This measurement determines how large an arc your faucet can cover within the sink basin. This aspect of your faucet also needs to be coordinated with your sink size so the water stream does not hit too far back or forward within the basin.

Spread

When you shop kitchen faucets you will see terms like “8-inch center spread”. This refers to the distance from the center of one hole to the center of the farthest hole on the other side. Some widespread kitchen faucets come with flexible water line hoses that allow for some variance in spread.