How to Repair Drywall
Drywall is relatively simple to install and easy to repair. It’s also easy to repair badly, which can leave a lumpy mess that declares “shoddy” to anyone who enters the room.
It’s best to do a repair with three or four thin coats of compound–if possible leaving sanding for just the last coat. Also, “the most important thing with a repair is to build the joint out wider than you would normally,” says drywall contractor Rick Schwartz, who serves as secretary treasurer of Marietta Drywall in Marietta, Ga. The key is to leave a wide and very shallow slope on all sides, he says
Note that in some cases we show mesh tape with lightweight or all-purpose compound applied over it. Strictly speaking, for maximum strength mesh tape is best used with setting-type drywall compound. For small repairs, however, that’s impractical. If you’re really concerned about strength, use paper tape for all repairs. Be advised that it’s more difficult to work with in some of the repairs we show.
Watch The Weight
If you have several large repairs to do and you’ll be buying a sheet or two of drywall, be advised that a sheet of regular 1/2-in. drywall weighs about 1.7 pounds per square foot. That means a 1/2-in. 4 x 8-ft. sheet weighs a bit more than 54 pounds (a 3/8-in. sheet weighs almost 45 pounds). If you stand it on edge and it falls over, someone–especially a child–could get hurt.
Beware Of Buckets
Five-gal. compound buckets pose a drowning or suffocation hazard to small children–when they are new and filled with compound, or later after they are cleaned and used for car washing and other jobs.
Tips for Working with Drywall
We’ve hung and patched and primed and finished our fair share of drywall. Check out this compilation of tips for working with drywall to make your next build or repair easier
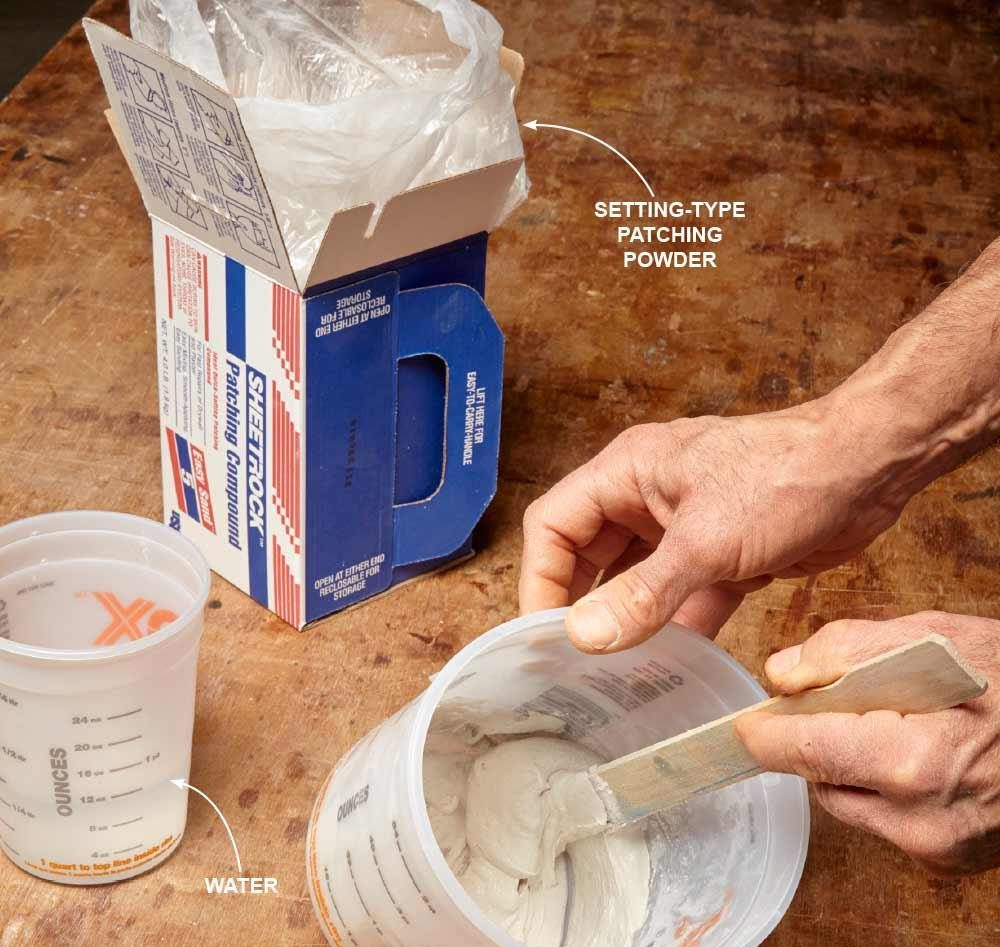
Use Setting Compound for Big Holes
It’s fine to fill screw holes and other small wall dings with patching compound, but for dime-size and larger drywall repairs, and for holes that are deep, it’s best to use a joint compound that sets up by a chemical reaction. These are available in powder form with setting times ranging from five to 90 minutes. The reaction starts when you mix in the water, and the compound hardens in the specified time. The five-minute version is nice because you can buy the powder in a convenient 5-lb. box, and the compound hardens quickly, so you can apply another coat right away. Remember, setting-type compounds are harder to sand than regular patching materials, so make sure to strike them off flush to the surface when you fill the hole. You’ll find setting-type compounds wherever drywall taping supplies are sold.
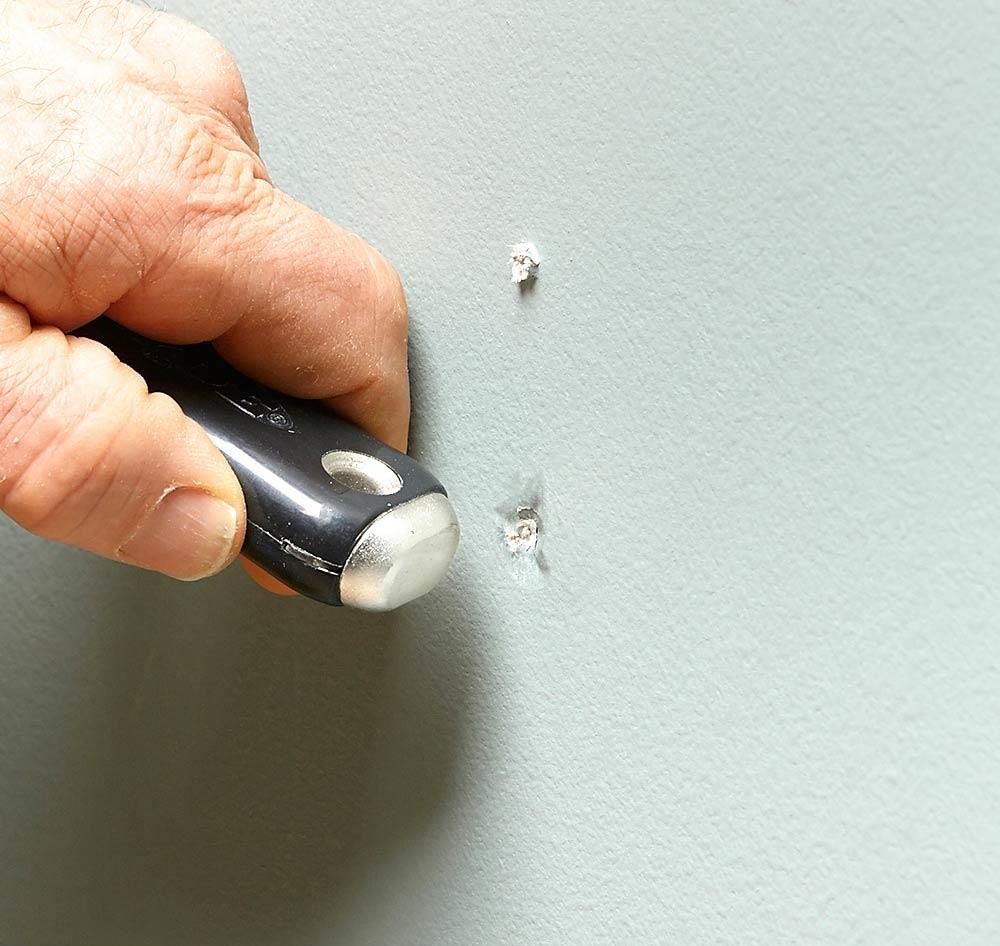
Make a Dent for the Patching Compound
When you remove a nail, drywall anchor or picture hanger, there is usually a little ridge of old paint or drywall sticking out that’s hard to cover with patching material. The solution is to make a dent over the hole, and then fill the dent. Most good-quality putty knives have a rounded hard plastic or brass end on the handle that works perfectly for making the dent. The rounded end of a screwdriver handle or the handle of a utility knife will also work. Press the handle against the hole and twist it slightly while applying pressure to dent the surface, or if you have good aim, use your denting tool like a hammer
Cover Cracks with Repair Spray
Stress cracks usually show up around window and door openings. The cracks are the result of framing movement and are hard to fix permanently. But using spray-on crack repair is a good way to at least extend the life of your repair. The spray forms a flexible membrane over the crack that can stretch and relax as the building moves.
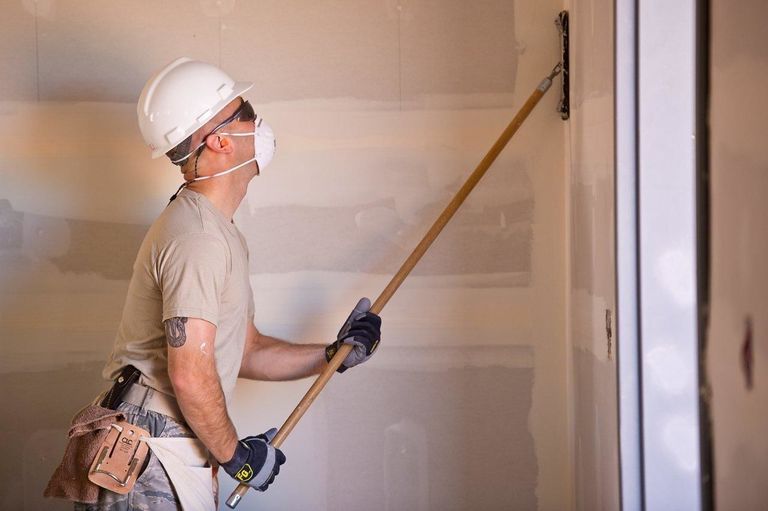
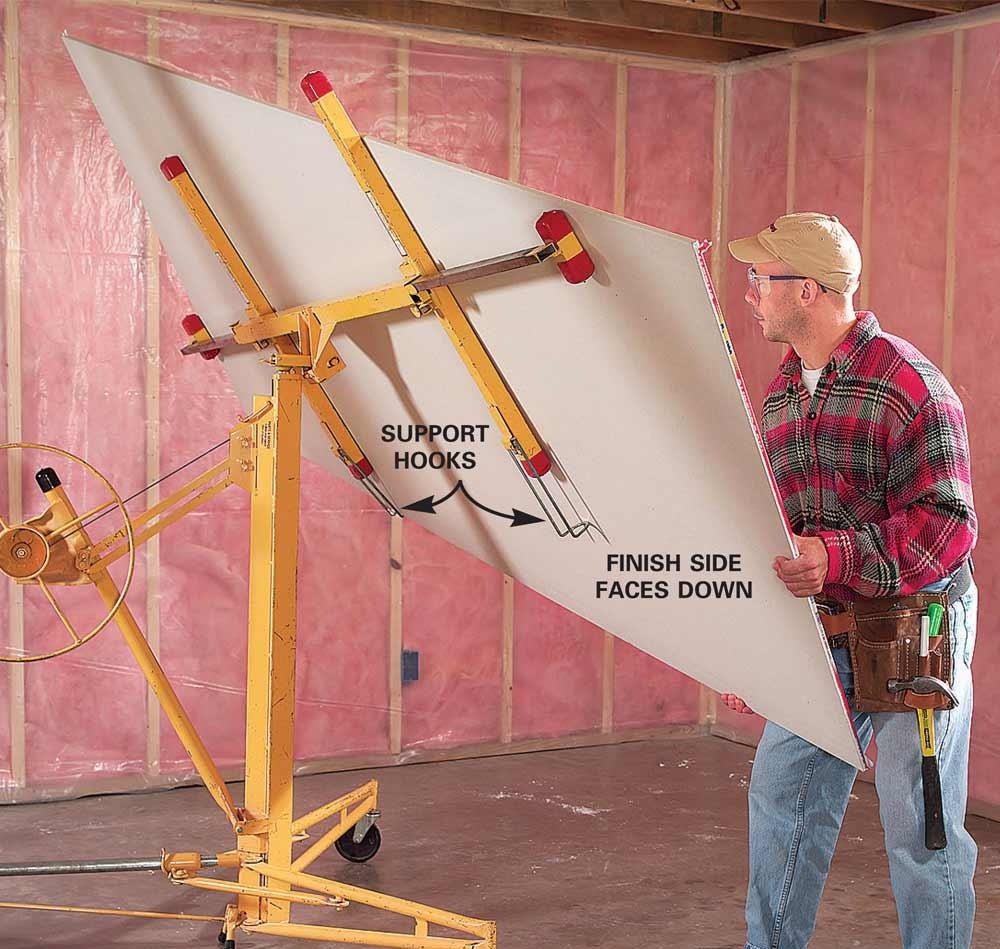
Rent a Drywall Lift for Ceiling Work
If you have to drywall a ceiling, don’t hesitate to rent a lift. It’s well worth the daily rental fee and is by far the best way to get a ceiling up without back strain.
Tips for Better Drywall Taping
To hide “butt joints” (where two non-tapered ends of drywall meet), you have to build up a hump of joint compound that’s very thin and wide. This is time consuming and difficult to do well. So if you’re a novice drywall finisher, avoiding butt joints is smart.
The best way to avoid butt joints is to use sheets of drywall that are long enough to cover entire walls and ceilings. As a result, you’ll have only tapered joints to finish. Drywall sheets are commonly available in 8- and 12-ft. lengths, and specialty suppliers carry 14-ft. sheets.
If your ceiling is longer than 14 ft., you can’t avoid butt joints. But you can avoid butt joints on a wall that exceeds 14 ft. Simply hang the sheets vertically rather than horizontally. That way, you’ll have several tapered joints to cover, but no butt joints. Hanging drywall vertically is slower than hanging it horizontally because you have to make sure the tapered edges fall at the centers of studs. Cut the first sheet to width so the tapered edge lands on the center of a stud. After that, the edges of each sheet should fall perfectly on studs. If you run into misplaced studs, nail 2x2s to them. If you have 9-ft. ceilings, call a drywall supplier to find 10-ft.-long sheets.
Use mesh tape, not paper
Pros use paper tape to strengthen joints. But in less-skilled hands, paper tape can ripple, slip out of place or trap air bubbles. If you push too hard as you embed paper tape, you’ll squeeze out all the joint compound behind it and the tape will peel off later. Adhesive-backed mesh tape eliminates all those glitches. Just stick it in place and it stays put, leaving you free to concentrate on spreading a smooth coat of mud. And since it doesn’t require an underlying layer of compound, mesh allows for a thinner buildup over butt joints and repairs. You can use mesh anywhere except inside corners.
Fill joints faster with setting-type compound
Mixing up setting compound is a messy nuisance, but it’s worth it. Setting compound has three key advantages over premixed versions: It allows you to use mesh tape, it hardens fast and it shrinks much less. Quick hardening and low shrinkage make setting compound perfect for deep filling. A thick layer of premixed compound takes days to dry and shrinks. You’ll need several coats to fill the depression, and the more layers you add, the harder it is to get smooth results.
Choosing the Best Type of Drywall Compound
Drywall mud, also called joint compound, is a gypsum-based paste used to finish drywall joints and corners in new drywall installations. It’s also handy for repairing cracks and holes in existing drywall and plaster surfaces. Drywall mud comes in four basic types, and each has its advantages and disadvantages. You may choose one type for your project or use a combination of compounds for the desired results.
All-Purpose Compound: Best All-Around Drywall Mud
All-purpose compound is a pre-mixed mud sold in buckets and boxes. It can be used for all phases of drywall finishing: embedding joint tape and filler and finish coats, as well as for texturing and skim-coating. Because it is lightweight and has a slow drying time, it’s very easy to work with and is the preferred option for DIYers for coating the first three layers over drywall joints. However, an all-purpose compound is not as strong as other types, such as topping compound.
Topping Compound: Best Mud for Final Coats
Topping compound is the ideal mud to use after the first two coats of taping compound have been applied to a taped drywall joint. Topping compound is a low-shrinking compound that goes on smoothly and offers a very strong bond. It is also highly workable. Topping compound typically is sold in dry powder that you mix with water. This does make it less convenient than premixed compound, but it allows you to mix just as much as you need; you can save the rest of the dry powder for future use.
Taping Compound: Best for Applying Tape and Covering Plaster Cracks
True to its name, a taping compound is ideal for embedding joint tape for the first phase of finishing drywall joints. Taping compound dries harder and is more difficult to sand than all-purpose and topping compounds. Taping compound is also the best option if you need to cover plaster cracks and when superior bonding and crack-resistance are required, such as around door and window openings (which tend to crack due to house settling). It is also the best mud option for laminating drywall panels in multi-layer partitions and ceilings.
Quick-Setting Compound: Best When Time Is Critical
Commonly called “hot mud,” quick-setting compound is ideal when you need to finish a job quickly or when you want to apply multiple coats on the same day. Sometimes called simply “setting compound,” this form is also useful for filling deep cracks and holes in drywall and plaster, where drying time can become an issue. If you are working in an area with high humidity, you might want to use this compound to ensure a proper drywall finish. It sets by chemical reaction, rather than simple evaporation of water, as is the case with other compounds. This means that quick-setting compound will set in damp conditions.
HOW TO REPAIR A HOLE IN DRYWALL
Drywall repair is a common home maintenance task that many homeowners can do themselves. The skill set, tools and techniques required for drywall repair depend on the size of the hole. If you can flip a fried egg, you can easily patch a small nick in your drywall, but it gets trickier as the holes get bigger. But don’t worry; Mr. Handyman is here to help! Download our Drywall Repair Guide for step-by-step instructions.
Drywall Repair Techniques
The size of the hole will determine what method of repair you’ll use. You may not need all of these tools – before you purchase anything, reference the guidelines below to see what you’ll need. You’ll find the required materials listed with each step. Drywall tape is available in paper or mesh, select mesh if you have a choice. The tools in bold are required for each step, regardless of hole size.
HOW TO PATCH A SMALL HOLE (ANYTHING SMALLER THAN A NICKEL)
Small holes in drywall are simple to fix. Any hole larger than a nickel should be repaired with the instructions under Medium or Large hole. Use spackle or joint compound to fill the hole. If you’re using joint compound, buy it pre-mixed for small DIY jobs. Spackle may shrink as it dries in larger holes and may require an extra application. Joint compound may run out or bulge as it sets and will require sanding and a second application.
HOW TO PATCH A MEDIUM HOLE (ANYTHING SMALLER THAN SIX INCHES)
For a professional finish follow the instructions under Large hole. This method requires finesse to feather the joint compound into the rest of the wall – if not done correctly, you will see a slight bulge in the wall. You must feather the repair area (gradually reduce the thickness outward) when applying the joint compound and in the sanding stage. Use a drywall patch that is slightly larger than the hole that needs to be repaired. You can purchase these at your local hardware store. Look for a kit, which will include everything you need
HOW TO PATCH A LARGE HOLE (ANYTHING LARGER THAN SIX INCHES)
Take your time, and be careful not to nick any wires or plumbing during installation. Although this method requires more tools, the final result is more professional looking.